Email notification integration allows you to automatically send emails when specific events or actions occur within your system. It helps keep users, administrators, or teams informed in real time about updates, alerts, or important activities.
By integrating email notifications, you can improve communication, enhance user engagement, and ensure timely responses to critical events. The process typically involves configuring email settings, defining trigger events, and customizing the message content to suit your needs.
Set up Email Notification #
OptinCraft comes with the Email Notification setting. It ensures you or your team get notified the moment a visitor engages with your campaign, allowing for immediate follow-up.
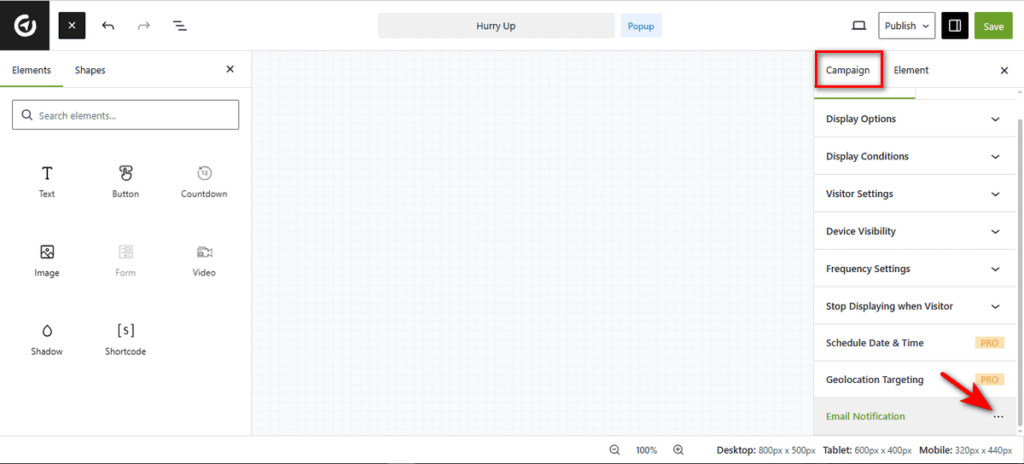
Let’s set it up. To do that, open your target campaign in the Canvas Builder.
Then, look at the right sidebar. Scroll down to the bottom and click on the “Email Notification” tab under ‘Campaign’ to open the integrations menu.
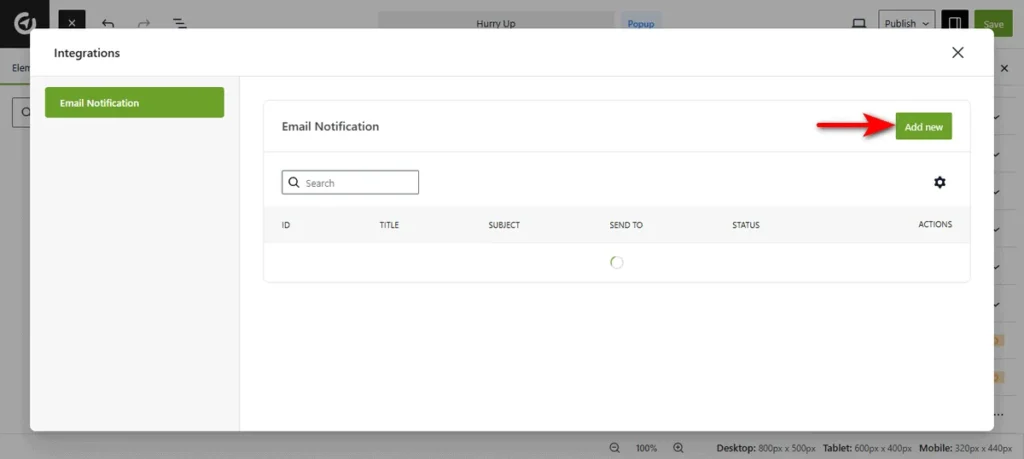
At this moment, a modal window titled ‘Integrations’ will appear. Now, click the “Add new” button to start configuring your alert.
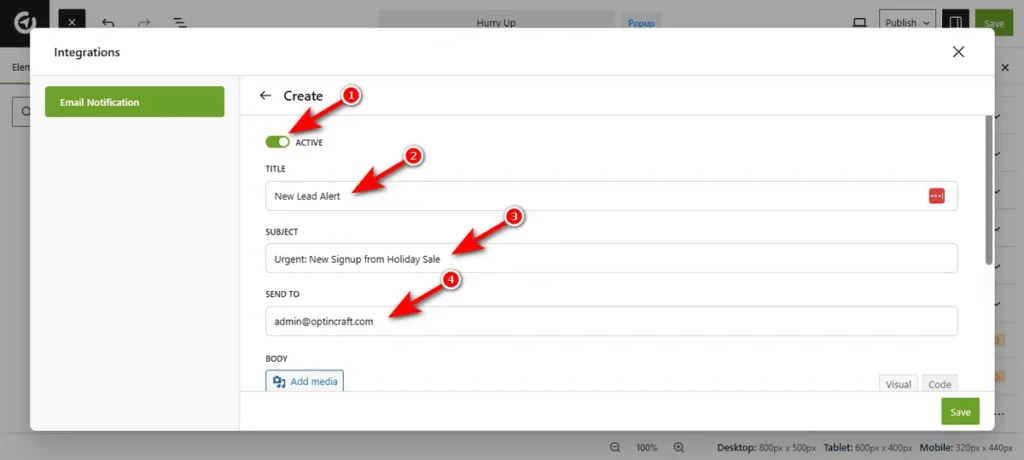
Afterward, you need to configure delivery details. Here are the options you’ll get at this stage.
- 1. Active: Toggle this switch to On to ensure the notification is live and running.
- 2. Title: Enter a name for these notification settings. This is for your internal reference.
- 3. Subject: Write the subject line that will appear in your email inbox.
- 4. Send To: Enter the email address where you want to receive these notifications.
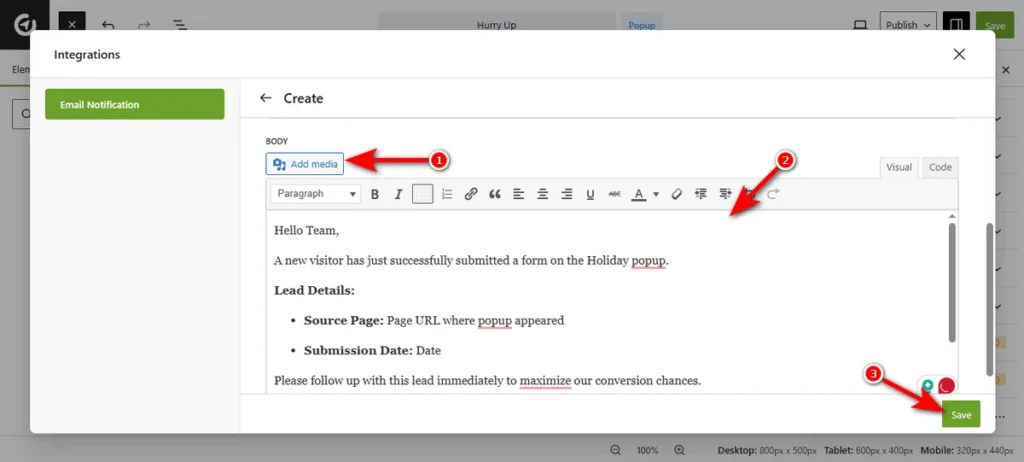
Finally, design the email content using the built-in editor.
- 1. Add Media: Click this button if you need to insert images, such as your company logo, into the email body.
- 2. Body Editor: Use the rich text editor to write your message. You can format text, add links, and structure the data to make it easy to read.
- 3. Save: Once you are satisfied with the setup, click the ‘Save’ button at the bottom right to activate the notification.
That’s how easily you can set up email notifications.


