Treating every visitor the same is a mistake. A ‘Welcome’ discount is perfect for new users but irrelevant to loyal customers.
Conversely, a “Welcome Back” message only makes sense for those returning to your site.
Visitor Settings allow you to target users based on their history with your brand.
How to Set Visitor Targeting #
Open your campaign in the Canvas Builder.
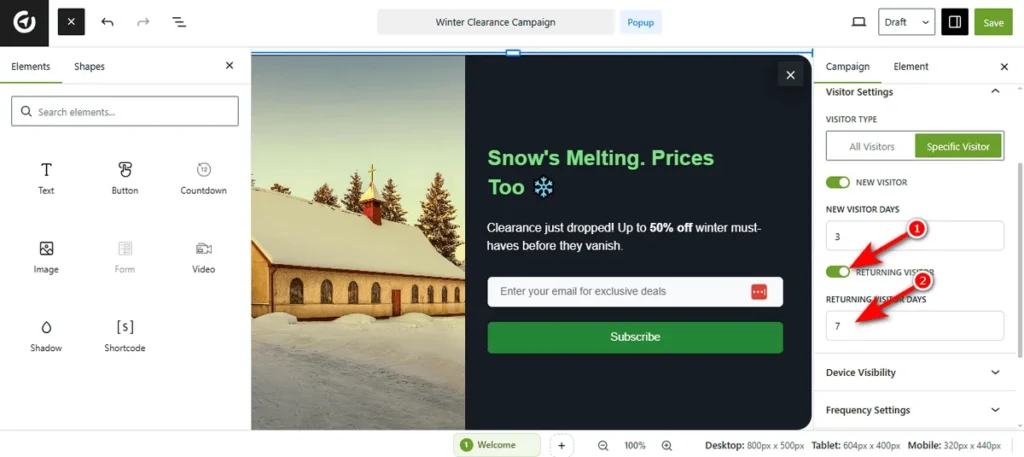
Head over to the right sidebar and click the Visitor Settings tab to expand the menu.
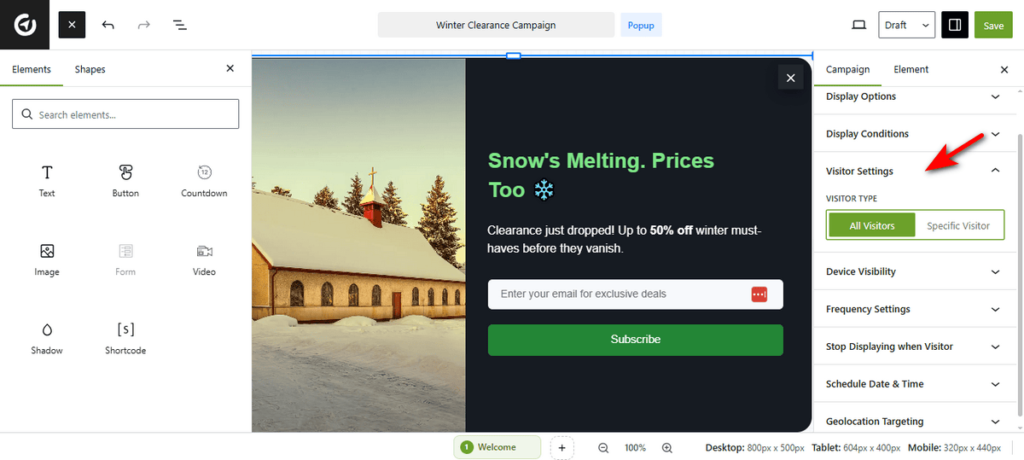
By default, the campaign targets All Visitors.
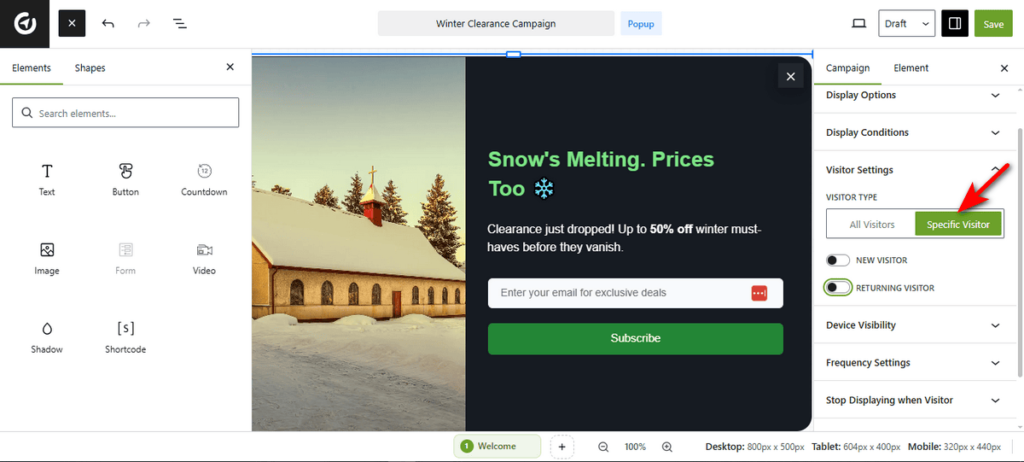
To apply restrictions, hit the “Specific Visitor” button.
Toggle the New Visitor switch to On to show the popup only to first-time arrivals, if you want to display the popup to new visitors.
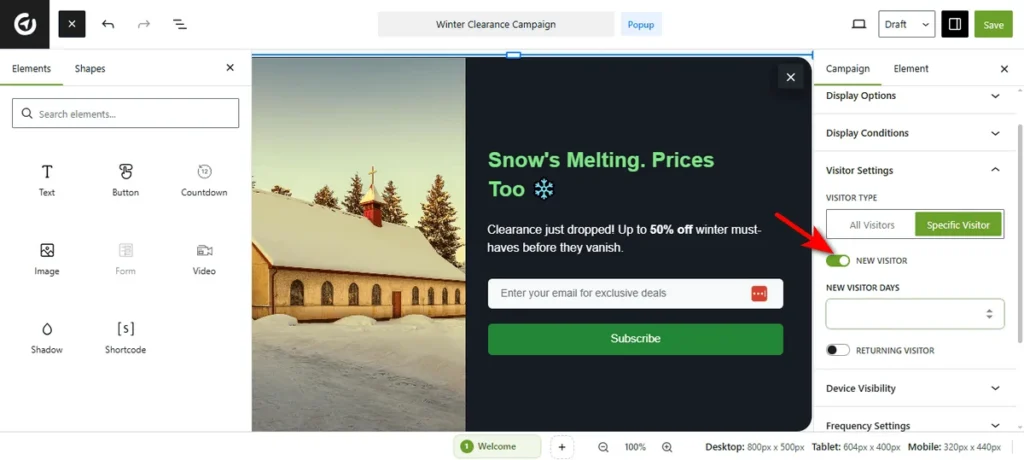
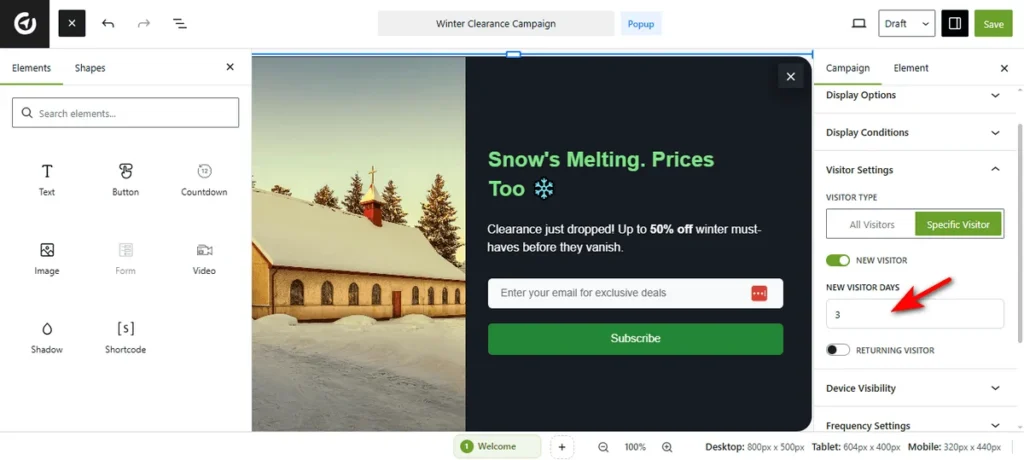
Now, you need to enter a number in the “New Visitor Days” field to define a timeframe.
Let’s say if you enter ‘3,’ OptinCraft will consider a user ‘new’ for 3 days after their first visit.
If you want to target returning visitors, turn on the Returning Visitor switch to display the campaign to users who are coming back to your site.
Then, enter a value to define the gap.
If you enter ‘7,’ the plugin will target users returning within that 7-day window.
Now, publish your campaign. That’s it. You can now deliver personalized messages based on user loyalty.


