The On Page Exit Intent trigger is one of the most effective conversion tools in OptinCraft. It detects when a visitor is about to leave your website and displays a popup at the ideal moment—right before they exit. This gives you a valuable last chance to capture leads, reduce cart abandonment, promote offers, or highlight important information before the visitor leaves your page.
Before you begin, ensure that the Free and Pro versions of OptinCraft are installed and activated on your WordPress site.
Create an Exit Intent Popup #
Follow the steps below to create and configure an Exit Intent popup:
Access the Campaigns Section
Navigate to your WordPress dashboard and go to OptinCraft > Campaigns.
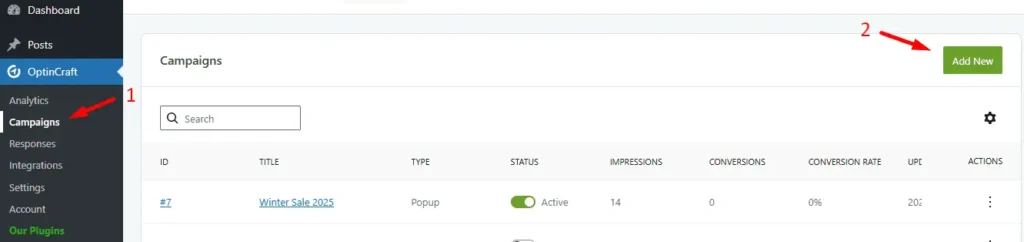
Create a New Campaign
- Click Add New.
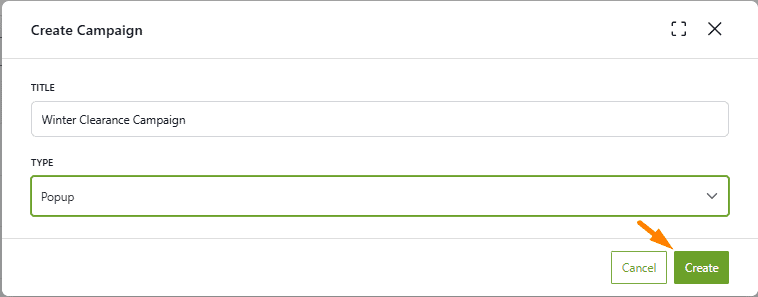
- Enter a title for your campaign.
- Select Popup as the campaign type.
Then hit the Create button.
The OptinCraft editor interface will load automatically.
Choose and Customize Your Popup Design
In the editor, click on Texts to explore and select from the available popup elements and templates.

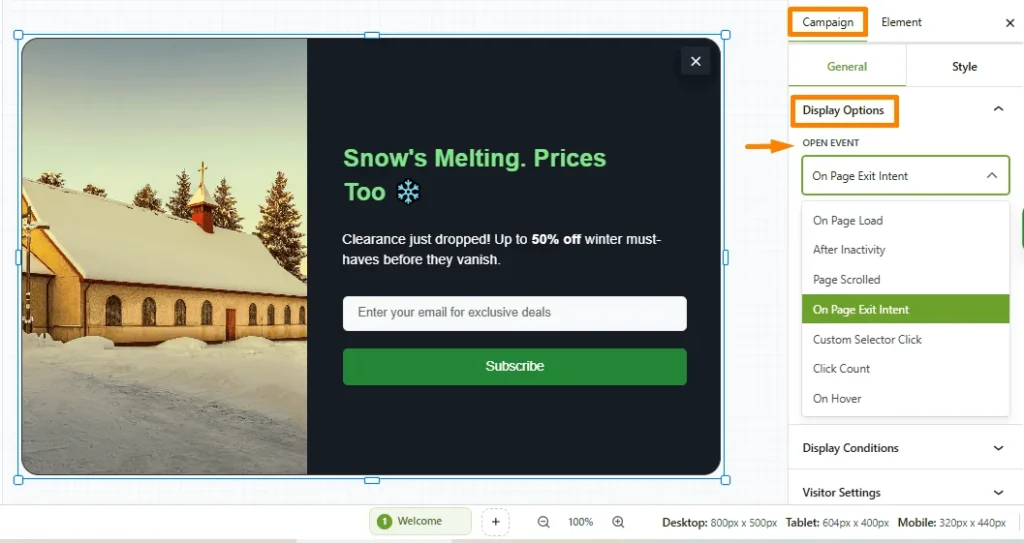
Configure Exit Intent Settings
In the top-right corner of the editor, click Campaign Settings and follow these steps:
- Go to Display Options.
- Find the Open Event dropdown.
- Select On Page Exit Intent from the list.
Publish Your Campaign
Once configured, your popup is ready to trigger when visitors attempt to leave the page.
With these steps completed, your Exit Intent popup will help you re-engage visitors at the most crucial moment, increasing conversions and reducing lost opportunities.


