A popup’s power isn’t in how it looks, but in when it appears.
Visitors arrive with purpose, curiosity, or hesitation, and timing determines whether your message feels helpful or intrusive. A well-scheduled popup blends into the journey, while a poorly timed one breaks it.
In this guide, we’ll show you how to schedule a popup campaign using a WordPress popup plugin like OptinCraft, giving you control over these moments.
So, without further ado, let’s dig deeper.
How to Schedule a Popup Campaign with OptinCraft
Before proceeding, make sure you have both the free and Pro versions of OptinCraft installed.
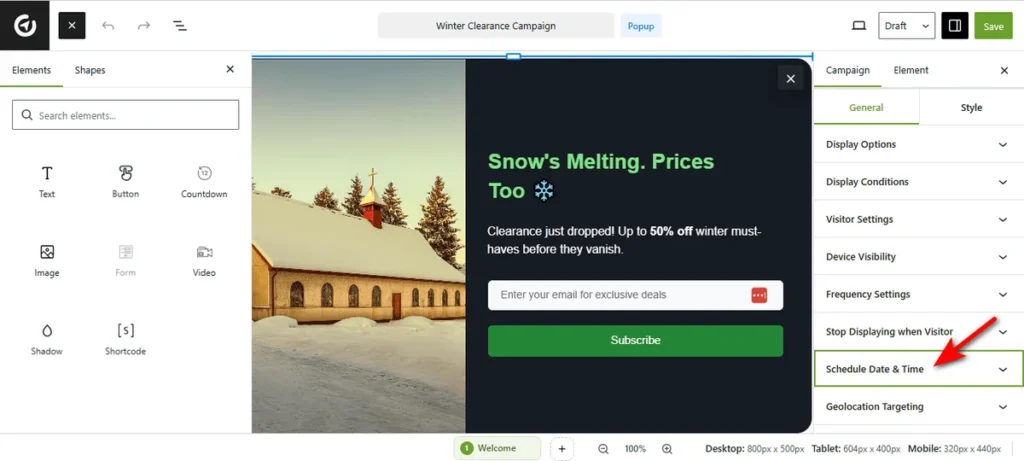
At first, open your campaign in the Canvas Builder.
Navigate to the right sidebar and click the “Schedule Date & Time” tab to reveal the calendar controls.
Now, as you click the ‘Start’ field, a calendar popup titled “Date And Time” will appear.
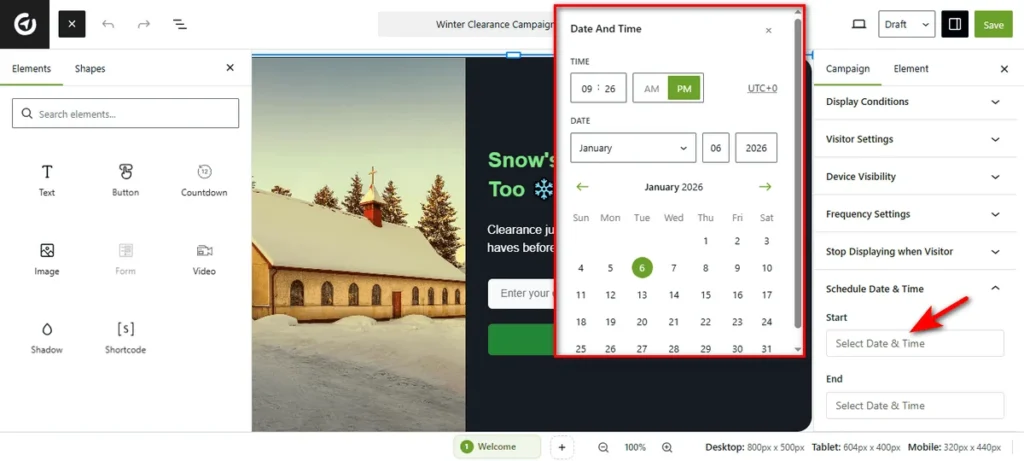
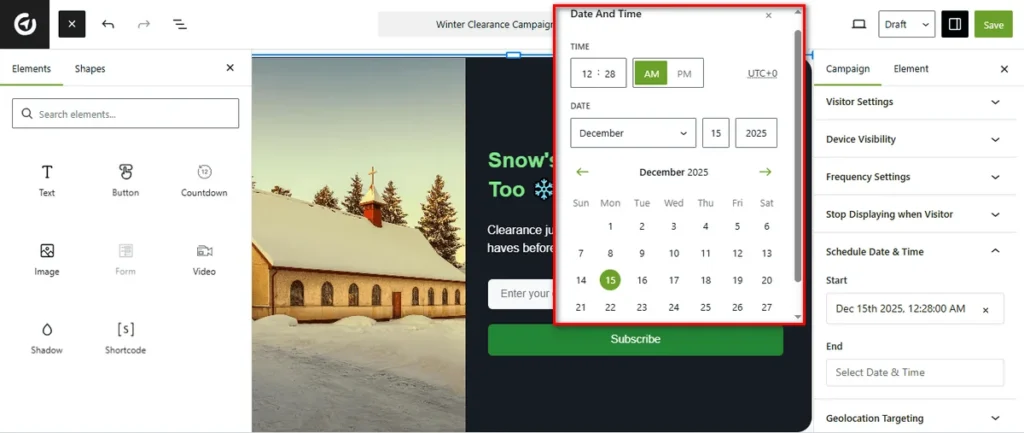
Select the exact day you want the campaign to go live. Use the time selector at the top to define the specific hour and minute (e.g., 12:28 AM).
Similarly, click the ‘End’ field to define when the campaign stops. Select your desired expiration date and time from the calendar.
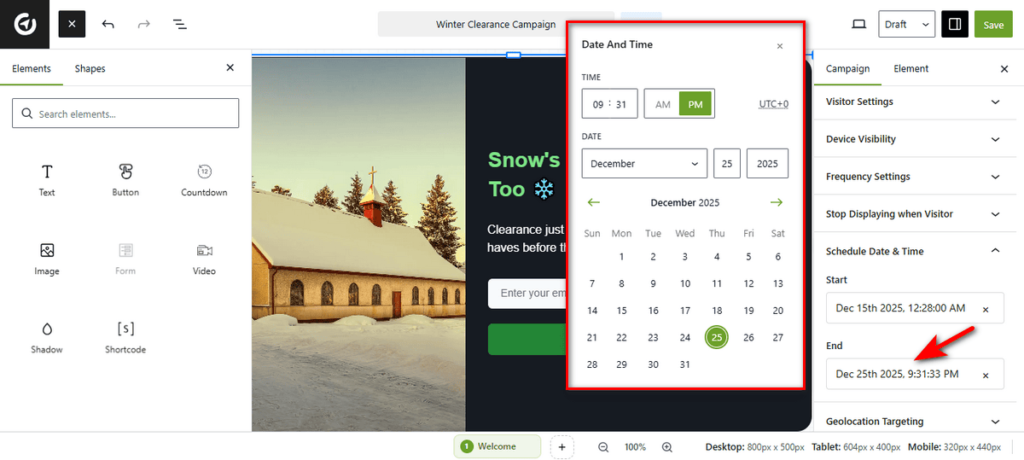
Once configured, hit the ‘Save’ button and your campaign will automatically launch and close according to this schedule, requiring no manual intervention!
Final Thoughts
Scheduling a popup campaign helps you show messages to your audience at the right time, increasing engagement and effectiveness. By setting start and end times and choosing the right triggers, you can make your campaigns more organized and timely.
Monitoring your popup performance is important to see what works best. Adjusting the schedule based on results ensures your popups stay effective and continue to drive engagement.